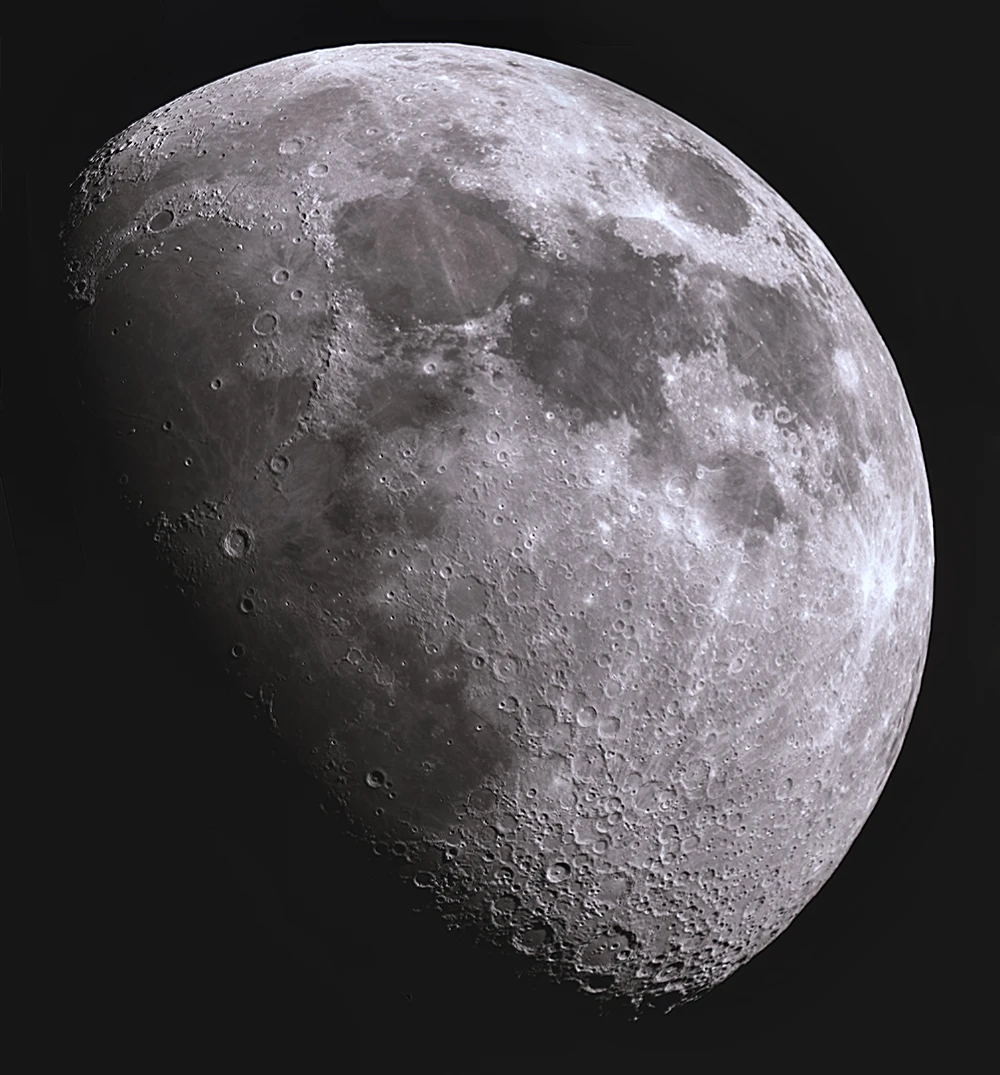
You can take a picture of the moon with any camera and lens or even with your smart phone. Using a tripod and a self-timer will reduce motion artifacts. When I capture the moon I start by putting the camera in manual mode and usually select an aperture of f/11, ISO at 100 and use a shutter speed of at about 1/100. I then adjust the ISO and shutter speed to optimize the brightness of the moon. Focus should also be set to manual and I start with a focus close to infinity. It is important to get perfect focus. Therefore I zoom in to a crater with maximal digital zoom and make small focus adjustments at this position to get the image as sharp as possible. Usually the moon image will be more interesting with a foreground object that catches the eye.
Taking several shots of the moon and stacking them in a software like Photoshop will increase signal to noise ratio making the details more clear. In this image however I used a method called “lucky imaging”. If you look at the moon through a telescope you will notice that the surface of the moon moves or vibrates. This is because you are looking through the earth’s atmosphere which is not still. To minimize the influence of the atmosphere you can take thousands of very short exposures by filming the celestial object like the moon, and then let the computer select the sharpest frames and stack them.
I used lucky imaging in this picture but to increase the resolution even further I filmed the moon with a dedicated astrophotography camera with a small sensor (ZWO ASI662 MC) through a telescope with a long focal length (1400 mm Celestron 8″ EdgeHD + 0.73 Reducer) and had to make several captures in order to cover the whole surface. In total I took 14 films each with a duration of 2 minutes with approximately 100 frames per second, making me and the computer process some 168 000 images to get this final image.
Stitched high resolution moon image

After making 14 separate films covering the moon surface the computer selected the 20 % sharpest frames in each film to stack. The 14 stacked images created by this process were then stitched together using a free program called “Image Composite Editor” creating this detailed image of the Waxing Gibbous Moon. To calculate the field of view obtained with this camera and telescope combination I visited the web site “Astronomy Tools” and the application “Field of View Calculator” on that site.
Moon phases explained
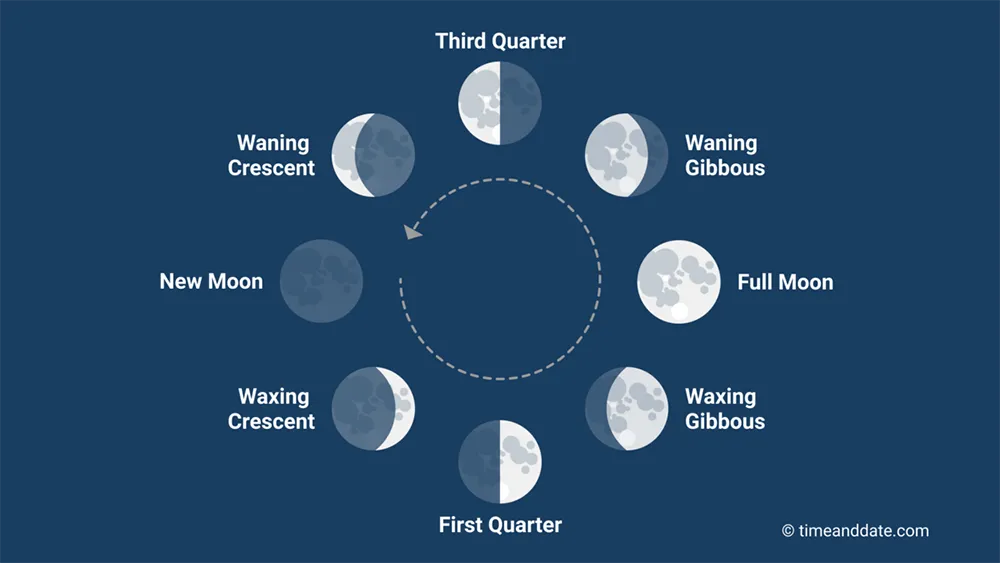
This illustration from @timeanddate.com shows the different phases of the moon and how they are referred to.